Confused about how to create a zip file (or simply how to zip a file)? Struggling to password protect a zip file? Either way, we got you.
Here’s everything you need to know about how to make, create, zip, and password protect zip files on Mac.
How to zip a file on Mac
Once you know how to zip a file, it’s a quick and easy way to bundle casual, low-stakes materials and send them off to friends, family members, or coworkers. (Check out our email best practices here).

To demonstrate, I found some gifs of pretty darn cute dogs. Let’s say I want to send them to all my friends, but don’t want to have to send them individually. (Who has time for that?!)
Enter: The ZIP file.
To zip a file, all you have to do is highlight the documents or images you wish to bundle and right click > “Compress [#] items”.

And presto, you’re done—you’ve created a zip file. If you’d like, you can double-click to open it to confirm nothing went wrong. (You can find it in the same folder as the images or documents you used to create it!)
Then, rename the file to your heart’s content.

How to Create and Password Protect a Zip File on Mac
Here’s where things get more complicated. Let’s say these adorable dogs are top-secret, and must be password protected. While it’s a snap to password protect PDF documents after you’ve created them, you have to simultaneously create and password protect a zip file.
There’s an easy way and a hard way to create and password protect a zip file. First, we’ll walkthrough the hard way, for kicks. If you’d prefer to skip directly to the easy way (recommended), feel free to skip this section and scroll on down to the next section!
You’ve got your dog gif and you want to compress.
First, open your Terminal app—this should be located in your Applications folder. When you open Terminal to create your secure zip file, you should be presented with a white box with text similar to that displayed in the following screenshot.

Next up? Set the destination of the file you wish to compress into a .zip. You can most easily start doing this by typing cd into the second line of text.
You’ll then want to open the folder containing the file you’re zipping (for example, Documents or Desktop or Downloads—or, in this case, DOGS). Drag the blue folder icon next to the name into the space on the line next to cd.

Next, copy the following text and change the names of the .zip and .gif to the desired name of your .zip file and the existing name of the existing file. For this demonstration, I’m using a gif, so I’m using the file extension .gif in the Terminal command—you’ll want to edit this accordingly.
zip -e desiredfilename.zip existingfilename.fileextension
Then, paste the command into the next open line in Terminal and hit enter. If nothing’s gone awry, you should be prompted with requests to enter and verify your password. Enter the requested twice and press enter each time.

And you’re done! Phew—surprisingly convoluted, right?

To confirm everything has gone right, you might as well click on the password protected zip file you’ve just created. The below screen should look familiar:

Got multiple files you want to send? That would involve either repeating this process for each individual file or modifying Terminal entry appropriately.
The Better Way to Password Protect a Zip File
Let’s be real: Even the most seasoned Terminal wizards don’t have time in their lives to password protect zip files in such a convoluted and non-scalable way. In fact, password protected zip files aren’t even secure. They’re only as secure as the password, which is likely floating in an email or text message to the intended recipient.
In this scenario, the stakes are low. I wish hackers were only after cute photos of yellow labs. But what if you’re sharing coveted bank information or a high-stakes business contract with a password protected zip file?
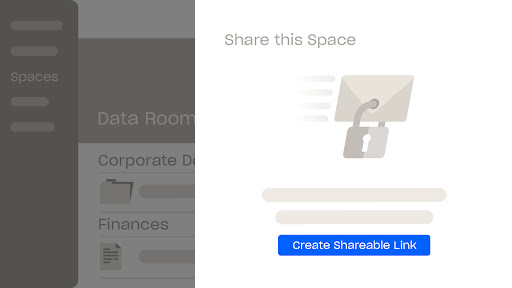
By ditching Terminal and sharing these materials with DocSend, you’ll be able to not only implement top-notch security measures, but also track engagement with detailed document analytics.
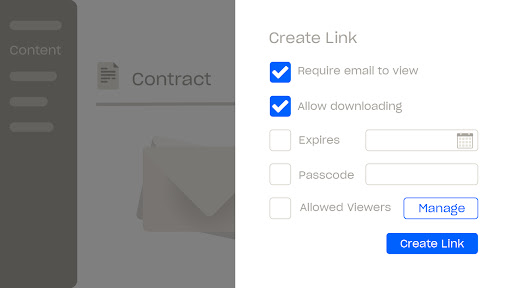
DocSend takes keeping your sensitive documents seriously (and makes protecting them way easier than adding a password to protect zip files). Our built-in security features put you in the driver’s seat when it comes to protecting your critical documents. Maintain control over who has access with password protection, access controls, and email verification. You can even schedule expiration dates for file access, disable downloading, and include an NDA that viewers must sign before being able to access your documents or data room. Learn more about our one-click NDA or download our NDA template.
Securely send and track with spreadsheet sharing controls
Learn MoreIf you’re looking to share a group of these files securely, and don’t want to deal with the hassle of creating individual links in DocSend, you can upload all your sensitive business documents into a virtual data room. With Data Rooms, you can share business-critical materials quickly, securely, and at scale.
Ready to start sharing sensitive documents with ease and security? Sign up for a free trial with DocSend. If you have any questions, our support team is always happy to help.